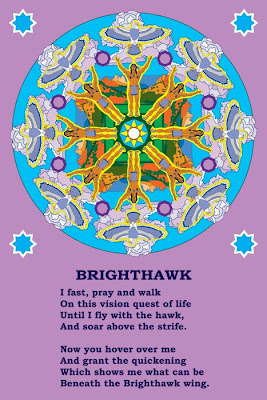
 This is the completed mandala. It took several steps to get here. First, I cntrl dragged our Sedona bakground into our mandala. I scaled it down to size, rotated it and placed in position. I had to distort the image a little to make it more vertical. So I pulled in on the sides.
*******
Then I duplicated and rotated to get the ring of eight backgrounds. Next, I used the shape tool to create a deep green ocatagon for the center.
*******
Then I pulled up the image with the ring of stars. I deleted all the central elements leaving the deep purple circle and the ring of stars. I linked all the elements in the circle with the Sedona background and clouds. I then cntrl dragged it into the ring of stars. I had to scale it down a little and place it on center. I wanted the clouds to overlap the star ring, so I had to restack layers to accomplish that.
*******
Now we get to admire what we have done. I'm sure improvements could be made, but I am satisfied to where I am ready to move on to other things. Part of the beauty of these programs is that if I get inspired to add or change something later, I can go back and do so. As long as you keep layered versions, it is easy.
*******
At this point, I make a duplicate image and flatten it, but I save the layered version. I can then save in different formats as needed. I will usaually keep a PDF in CMYK for printing, a hi resolution JPG for viewing in Photo Gallery and so on, and a lo resolution JPG for the web as well as my PSD or CDR files
*******
I hope you have found these lessons helpful. Feel free to give feedback, make suggestions and spout off respectfully.


